This easy carrot craft for kids was originally slated for the spring crafts post. I thought this would be perfect for using Kwik Stix, but it turns out they dry a little too quick to make a footprint…or at least it dries too quick for the pace at which I move.
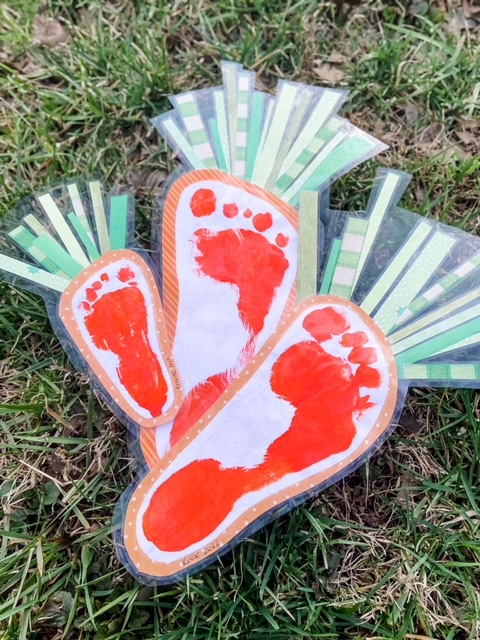
Nonetheless, we switched paint and the carrot footprint craft turned out exactly as cute as I had imagined. I actually ended up making 3 (my 2 kids and my niece) and giving them to my mom for a surprise Spring gift. I also added a magnet, so that she can keep her little carrot patch on her refrigerator.
Carrot Footprint Craft
First things first, collect your supplies. You will need the following:
Orange paint
Small paintbrush (I used foam)
White paper
Orange patterned paper
Several scraps of green paper, all different patterns & textures
As I mentioned earlier, I originally wanted to use Kwik Stix Paint Stix for this project, but it turned out that Kwik Stix dry too fast to make a good footprint (which is why Kwik Stix are so awesome!). I headed back to the art closet and found a bottle of orange acrylic paint. The orange acrylic paint ended up working perfectly.
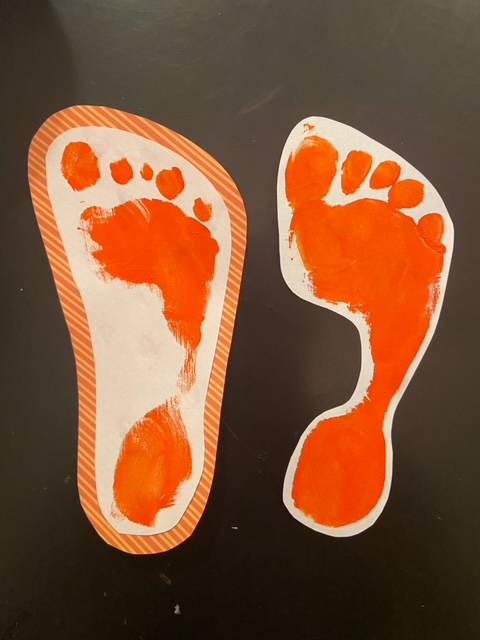
I used a small foam paint brush to paint the bottom of each of my kiddo’s feet. Once the bottom of the foot was completely covered with an even layer of paint, I helped them press their foot down on the white piece of paper. The key to a good footprint is to push the foot directly down (not from the side or at an angle) and lift directly up.
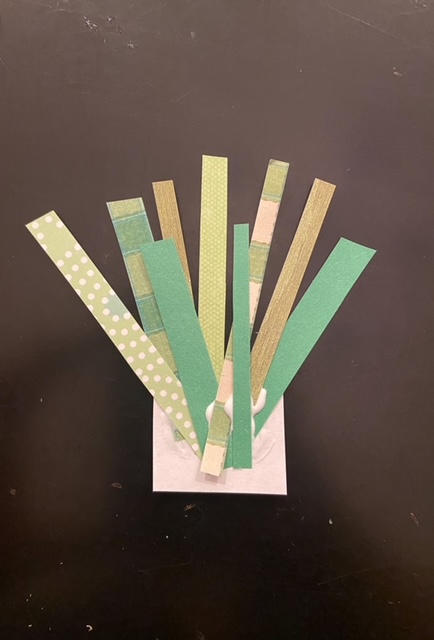
While the footprints dried, I used this time to cut small strips of green paper. These pieces of paper will eventually become the green top to my carrot-feet. It’s important to have a variety of textures, lengths, and widths. I dug through my old scrapbooking binder, but you could easily use magazine clippings, wrapping paper, tissue paper, cardstock, construction paper, etc.
Once the orange footprints are dry, cut them out. I think it looks best to leave a small white margin. I also prefer to leave the arch of the foot uncut, however I have included a picture of what both options look like.
Next, glue the cut-out footprint onto a piece of orange patterned paper. Then, once again, cut around the foot leaving a margin of the orange patterned paper showing. The width of the orange margin is totally up to you.
Finally, it’s carrottop-time. This is my favorite part of the whole project. Arrange the green strips of paper you cut out earlier to make the top of the carrot. I think it looks best when there are different heights, different patterns, etc. The easiest way I found to do this was to glue the green strips to a scrap piece of paper to before attaching to the carrot footprint. It makes it easier to arrange the strips and ensure you get them exactly how you want them. Once everything is how you want it to be, glue it to the back of your carrot footprint.
Now, this is totally optional, but the best way to preserve this sweet little footprint craft is to laminate it. However, who has access to a lamination machine? Teachers. That’s it. So, I have started using these self-adhesive lamination sheets and I think they work great. Another option is to pay to have it laminated at Office Depot or a similar store.
I love how these carrot footprints turned out! They make such fun springtime keepsakes!
For more spring-inspired fun, check out some of my other posts:


Good tip on laminating. I have had a few articles pieces that have gotten torn.
Thanks!! It was my first time using the lamination sheets and they worked great!
Pingback: itemprop="name">5 Spring Art Projects For Kids Using Kwik Stix Paint Stix - Our Lively Adventures